
This week I sent out a tweet about the main difference of having a door open in Unreal and Unity.
Today I learned that having a door opening takes me 3 minutes in @unity3d and 30 minutes in the @UnrealEngine.#needAbeer
— Chiara Rizzarda (@CrShelidon) 11 luglio 2017
Lots of you wondered what does it take to put some interaction into an architectural element such as, let’s say, a door. So here it is.
In order to have a door opening, of course, you need to have imported into unreal single components at least for your door panel and for your door frame. Otherwise you won’t be able to do anything decent out of it. So I suggest you export your Revit door from the family editor: you’ll get deconstructed elements for each solid modelled within.

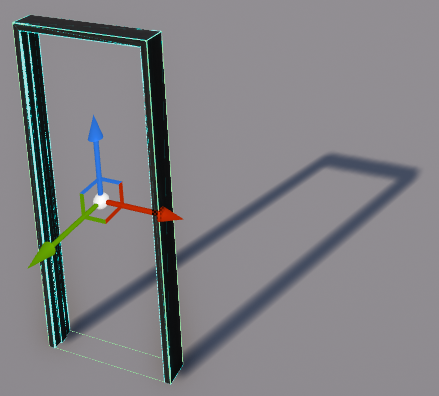
Step 1: open the static mesh of your door frame
After you’ve done so, the first step I recommend is opening the door frame in the static mesh editor (double-click) and check collision. You want to be able to go through the door when it’s open but you don’t want to go through the frame with some odd-looking effect.

If you open the object and turn the collision visualization on by clicking on the button above, you might have different results.

Scenario 1
If your frame looks like scenario 1, it’s ok. You checked the “auto generate collision” option while you were importing your geometries, and the Unreal engine created a net of collisions around the geometry of the frame. It’s a little heavy and might result in the engine misbehaving but overall it’s ok.
You can also decide not to turn that option on and you’ll have to draw collision boxes yourself around everything. As a workflow, and I apologize to the Unreal guys out there, I discourage you to do it. It’s long, time-consuming and we have to minimize the redundant work we do in Unreal as it’s not our authoring tool.
Whatever you do, just check that you don’t have a box like the one I have below.
Not like this
This will mean that the whole frame is surrounded by a collision box and the player will bounce against an invisible wall while trying to get through.
Create a Socket
The other thing you need to do with your door frame is put little objects called “sockets” in place, so that your door panel will know where to swing from. Think of them like hinges.

Turn on the socket manager window

Create a New Socket
Name the socket and put it in place. The socket is the point where your hinge are, so it’s possible that you already have something in your model to show you the position.

Door Hinge Position
Unlike in real life, there’s no need to have two hinges. Don’t tell the carpenter.
Make a Blueprint

Create a new Blueprint
Now, Blueprints are objects that allow you to create preset interactive and/or multimedial objects. The fire we had in the first article was a blueprint.
In order to have a door that swings open, you need to create a blueprint and import your door frame into it.
You are going to need a blueprint in class “actor”, since it’s an object.

You can import your frame simply by dragging and dropping it into your blueprint workspace. While you’re at it, you might want to drag the door into the work space as well. The first thing the socket will be useful for is to correctly putting the door panel in place. You can do so by choosing the socket as a “parent socket” in the properties for the panel.

The panel will align its origin to the point where you put the socket. It will also use that point as a center point for any transformation you might want to instruct on it. In our case, it will be the center for rotation.
Beware that also the panel should have collision activated, otherwise you’ll be able to go through the door and the whole opening thing will be kind of pointless.
If you didn’t want to mess with interactivity before, it’s highly likely that all your doors will have collision off, so it’s worth to check them.
A bit of Scripting
Now, the rotation is instructed in another tab you have: the Event Graph tab.

The three nodes already provided give you a rough idea of what you can do. What I suggest you use for starters is the middle one: Event.ActorBeginOverlap allows you to script an effect when the player enters a certain area of influence. The area of influence is simply set by placing another object within the blueprint: a Collision volume. I am going to use a box, but you can also use a sphere.

Mind that the Trigger is a child of the frame and not of the panel, otherwise weird things will happen, Satan will pop up and all hell will break loose.

Now, the idea is that when the player will collide with that box, something will happen. What will happen is that your door will transition from a closed position to an open position, right? Good.
Since your event is an animation, you are going to connect that Event.ActorBeginOverlap with a Timeline kind of node.

In order to script the animation of the door swinging open, you need to double-click on the timeline and tell it what to do. If you double-click on it, it opens a new odd-looking tab. What you need to do is adding a function, a float, and you do it by clicking on the symbol near the top.

In the float track, add a couple of keys (right-click) and place them at the correct time and space. If you place the first key at (0,0) you are stating the situation where the animation is just starting and nothing has happened yet. By placing the second key at (2,1) you are stating the situation where the animation is complete, after 2 seconds.

If you leave it like this, the animation will be linear and it will look rather odd. What you usually do is choosing a different kind of interpolation to give it some acceleration at the beginning, maybe, and a kind of soft stop when the animation is coming to an end.

Right-click on the key

This is a custom interpolation that starts slowly and ends slowly

This is a custom interpolation that starts fast and ends slowly
When you are done scripting the float and if you put a decent name to it, you’ll notice you have another output in your timeline node. Mine is called “Swing”.

Now, you need to actually animate the stuff.
Place the Set.RelativeRotation node that has the name of your panel in brackets. You’ll quickly get something like this:

Only that New Rotation node isn’t right: you want to be able to control your rotation only around the Z axis in a smooth, interesting way. Split that “New Rotation” pin by right clicking on it.

Now, look for a transitioning function called Lerp. You have different kinds of Lerp for all the animations you want: what we need is a linear interpolation, therefore a float Lerp.

This is where your head might start hurting.
What you need to do with that Lerp node is:
– promote to variables both A and B, which are the start and end point;
– rename the variables in Closed and Open, otherwise it’s a mess;
– edit the default value of Open and bring it to, let’s say, 90.
If the value of Closed stayed 0, what you have is a door that opens from 0 to 90 degrees. Pretty much.

The Alpha is the input that blends the Lerp, it’s the actual way your door with transition from A to B, so you need to connect it there.

How’s your headache? Everything good, I hope. All that’s left to do is connecting that Return Value of the Lerp to the Yawn rotation, the rotation on the Z axis, of that Set.RelativeRotation we left there to rot.

The finished result looks pretty much like this
Now, if you want the reverse all you have to do is connect the Reverse input of the Timeline with an OnComponentEndOverlap. You can call one by clicking on the trigger and pushing the correspondent green symbol in the event section of properties.

While you’re at it, you also need to tell the trigger box to ignore the collision of everything except the pawn (which is the player). You do that by turning off the Collision Presets and tweaking a bit with the custom properties.

Mind that the collision needs to be on “Query Only”. We want the scenario to stop and think when the pawn enters the box, we don’t want the pawn to bump against it and we might not want the door to open if you kick a digital dog towards it. You don’t kick digital dogs. Shame on you.

Now you’re ready for testing. Compile the blueprint, save it and place it in your level. Build. Try it out. It should work.
Things that can go wrong
- the door might be swinging the wrong way. No judgment, please, but if your door is swinging the opposite way just tweak with the value of “Open” and “Closed”: something is wrong with those with regards to the origin and orientation of your meshes;
- you bump into the door anyway. If collisions are set right, you might be too fat for that door. No judgment here as well, but what you might want to do is size down the capsule of your player to a reasonable size.


4 Comments
Salm46
Posted at 11:53h, 21 JulyUnreal è uno strumento dalla resa impressionante per realismo ed opportunità, ma prima di “entrare a regime” è un po’ macchinoso! Molti utilizzano Lumion, di facile utilizzo sin da subito, ma sicuramente dalla resa più ”cartoon”!
Carlotta
Posted at 17:58h, 09 JanuaryMind if I show your article on Facebook? It’s really good!
Raphael
Posted at 14:07h, 13 JanuaryIs it okay if I ask you to add some more detail? Perhaps show any further example? Thank you :)
shelidon
Posted at 17:14h, 14 JanuaryUnreal is has quite a steep learning curve and it’s complex to explain through blogging. Right now I kind of put it on hold, so I can’t promise I’ll publish anything on the topic any time soon.